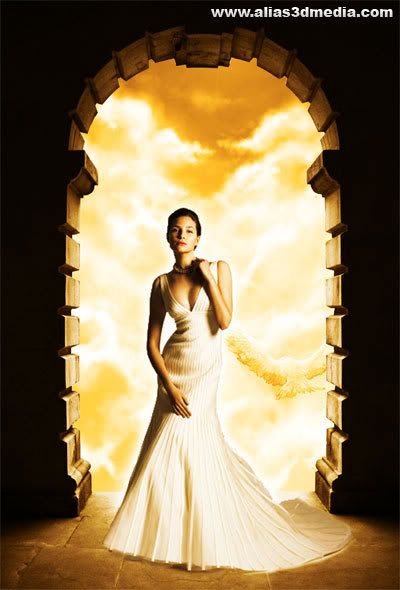
Final Image Preview
This is the final art we will be creating click the image for a larger preview
Step 1 - Selecting the images
Selecting the images is the most important thing in compositing so choose you'r images carefully, i first saw the entrance photo and thought what if this was the entrance to heavean & a beautifull lady is there to pick u up then i found the perfect photo of an Angel like women !

Step 2 - Cutting the images
First i cut the entance that was a easy job using the pen tool in photoshop in the same way i also cut out the angel but cutting out the angel is not a easy job


Step 3 - Placing the images
Next big thing is placing the right image in the right place, i did this with trial & error so ur free to place them any where u like, inside the entrance or out side. I chosed inside so i put the angel layer on top of the entrance layer.

Step 4 - The Background
the final image we are going to use is the background. I looked at a lot of sky photos and chose this one the is simply the best background for this composition. then i placed the background in a i like i want to show the bird so just scaled and moved it to the right place with the Free Transform tool first Select the background layer and choose Free Transform (ctrl + t) from the Edit menu after finding the right place & right scale press the Right symboy from the top

Step 5 - Adding the angel glow
For the glow i duplicated the angel layer by pressing ctrl+d while selecting the layer. then erased the parts that i dont wanto glow in my case the legs ! the applied some layer styles to that layer the setting are given below then i put the glow layer below the angel layer this really makes a difference


Step 5 - Color
Color is the important thing in any form of art color plays the major role in bringing the mood to the picture. First lects Adjust the background's Color. Select the Background layer and goto Layer - > New Adjusment Layer and choose Hue/Saturation and click ok and changed the setting til i get the right color again its all about trial and error the art is you'r so dont worry about making mitakes some times great art come from mistakes !. Also Remember to put the overlay mode to color


Step 5.1 - Entrance Color
Select the entrance image and do the same as above but remember to check Use Previous Layer to Creat Mask in the new layer window this will make sure that the background won't be affected from this color adjusment, then give the following setting. I used two Adjusment Layers with Clipping mask on to get the right color. Remember to put the fisrt Adjusment layer to Overlay and the second one in Color mode


Step 6 - The last one
Guess What.. The last one is all so a... Color Adjusment. The final one is for the angel this time WITHOUT the Clipping mask on And put it on Overlay Mode


